How To Make A Worm Farm For Fishing
Live Fishing Worms
Few things are more enjoyable than catching a big fish, and few things are better for catching a variety of big fish than live fishing worms. If you are someone that goes fishing often like myself, then you probably know that this highly common live bait can get expensive after several trips. Even if you don't mind the price of fishing bait worms, you may have experienced the gut wrenching feeling of dread that comes over you when you realize that you are nearly out of live fishing worms while you are out in the middle of nowhere on your fishing trip. These two key annoyances led me to a spontaneous and some what eccentric decision. I decided to make a worm farm for raising fishing worms. I got my fishing worm farm started today and hopefully within a few months I will have a growing army of fishing bait and will never have to buy worms or worry about running out again.
Benefits of Worm Castings
My real purpose in creating my worm farm is for a cost free constant supply of live fishing worms. The more common reason for worm farms is the because of the benefits of worm castings. If you look online you will see article after article about the benefits of worm castings in compost for gardens, along with article after article about how to create worm farms for this purpose. I however don't have a garden, and my worm farm is strictly for the purpose of live fishing worms. So if you are someone that is interested in creating a worm farm strictly for live fishing worms you may find my article more useful than someone who is seeking the benefits of worm castings. Of course that isn't to say my method couldn't be used to both purposes.
My Fishing Worm Farm
I read several articles online and they all made different recommendations on nearly every aspect of creating a worm farm. So using what similarities were common and my own best judgment I pieced together a rather simple and crudely designed fishing worm farm for less than twenty dollars. This is the first fishing worm farm I have ever made, and I'm very interested in seeing how it will turn out. If you are reading this and are considering using my method I'm sure you are too, and that is why I will make update posts periodically in the comments section about how my worms are doing, if I make any changes etc.


Plastic Storage Containers
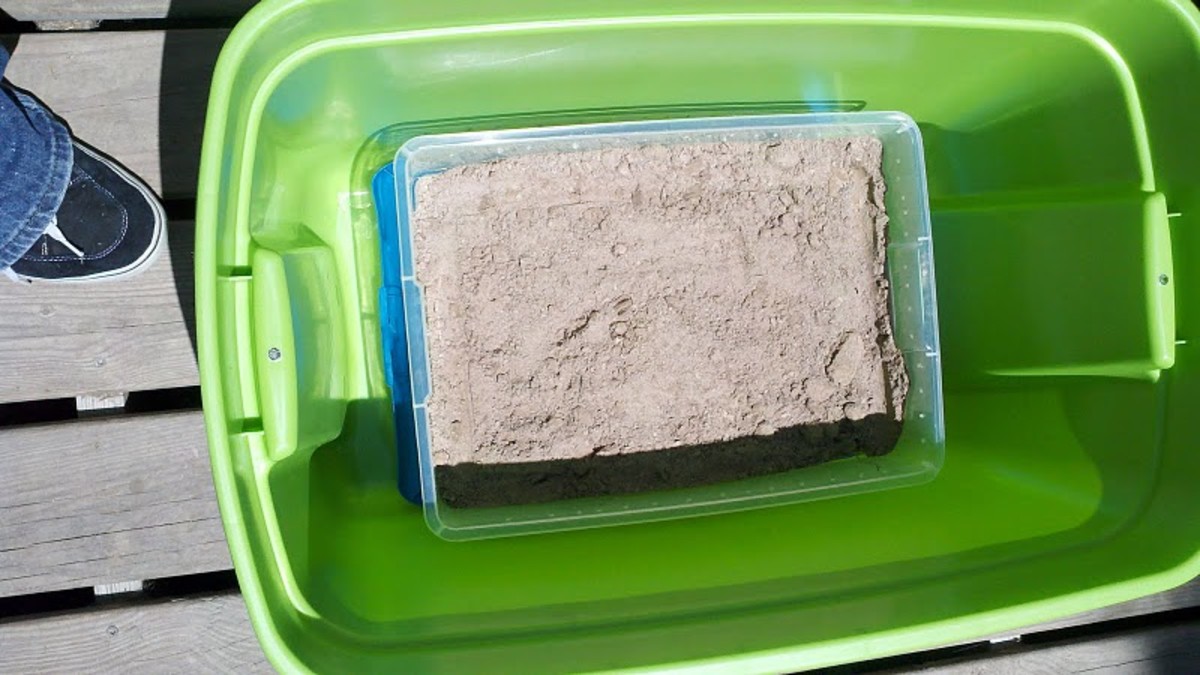
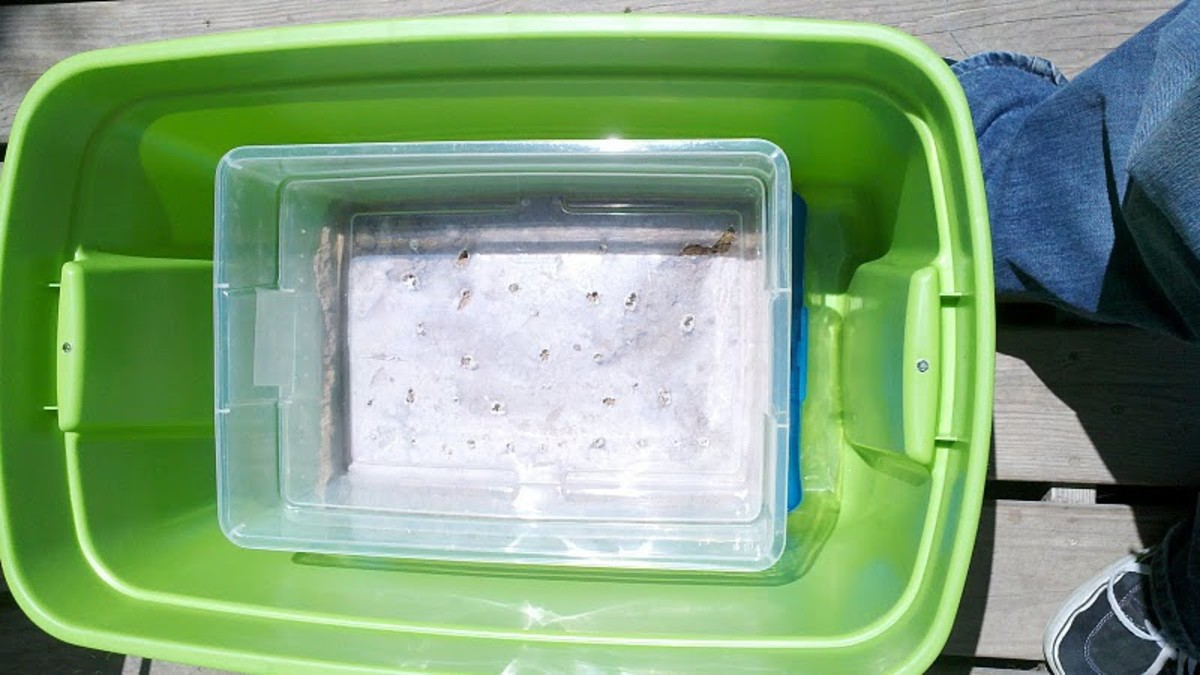
The first thing I bought was a large Plastic storage container. I intended this large box to do nothing but hold the worm farm inside of it, so I made sure that it wasn't clear because worms prefer the dark.
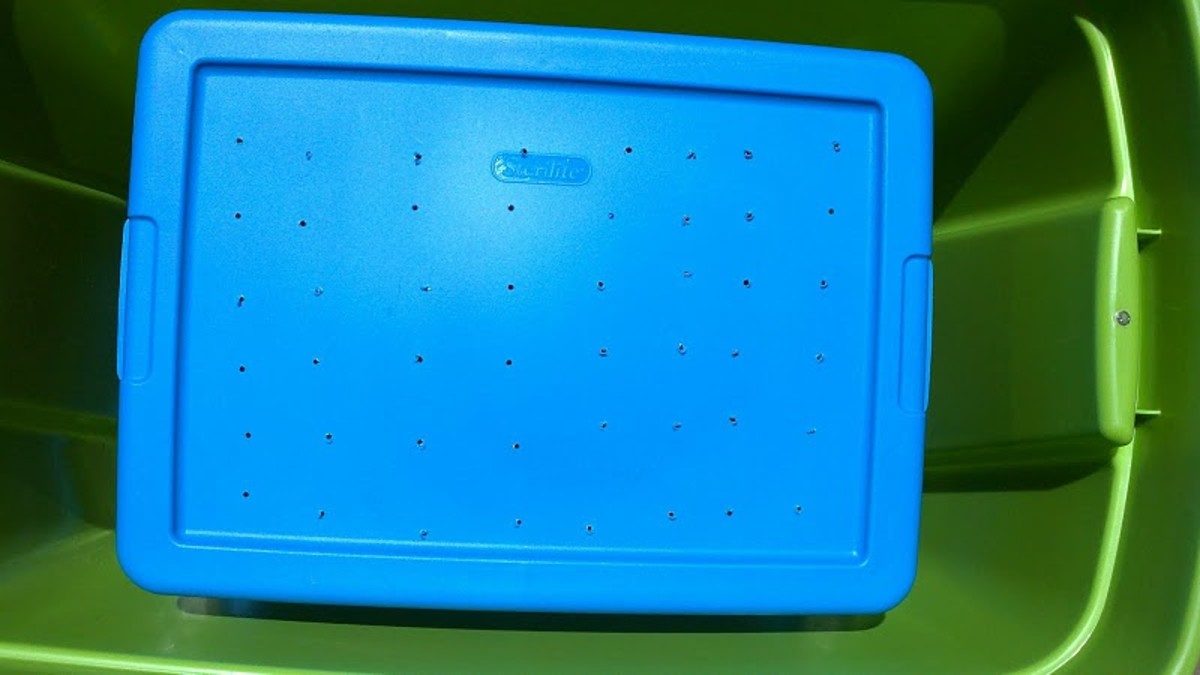
I also drilled some very small holes all over the lid so that air could get in to the worm farm.
I then bough two smaller plastic containers. The two I bought were clear, but I suppose it doesn't matter as long as the bigger box you are putting them in isn't clear. Remember, worms like the dark.
I drilled holes throughout the top of one of these lids so the worms could get air as well.


Filling the Bottom Container
I explain the purpose of having two matching containers shortly. Don't put your drill away just yet.
Before we get to that however, lets fill the first of the two matching boxes.
I am no expert on worms, but my thought was that maybe some things in nature provide nutrients they may need, so I included some random objects at the very bottom of the container. I included some green grass, dead grass, dead leaves, and a twig or two. You may not want to put these objects in yours but I'm including this info because I put them in mine. I have since read an article about large amounts of green grass being dangerous to your worm farm, so you may want to leave grass out.
The next thing I did was throw in soil until the container was about halfway full. I dug this soil out of ground. I didn't use store bought dirt. I'm not sure if that would actually be better or not, but, I was able to come up with a decent amount of moist dirt that didn't have to many rocks in. If you don't have the same luck as me or you think store bought dirt would be better, then by all means give it a shot.


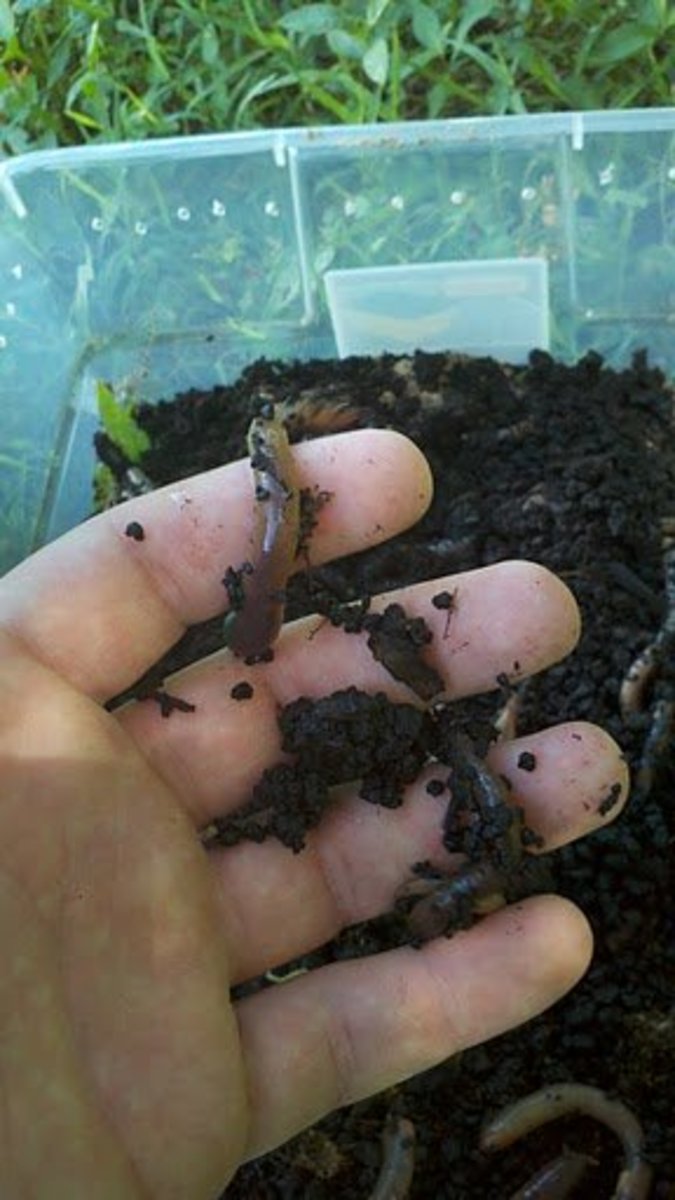
The Worms
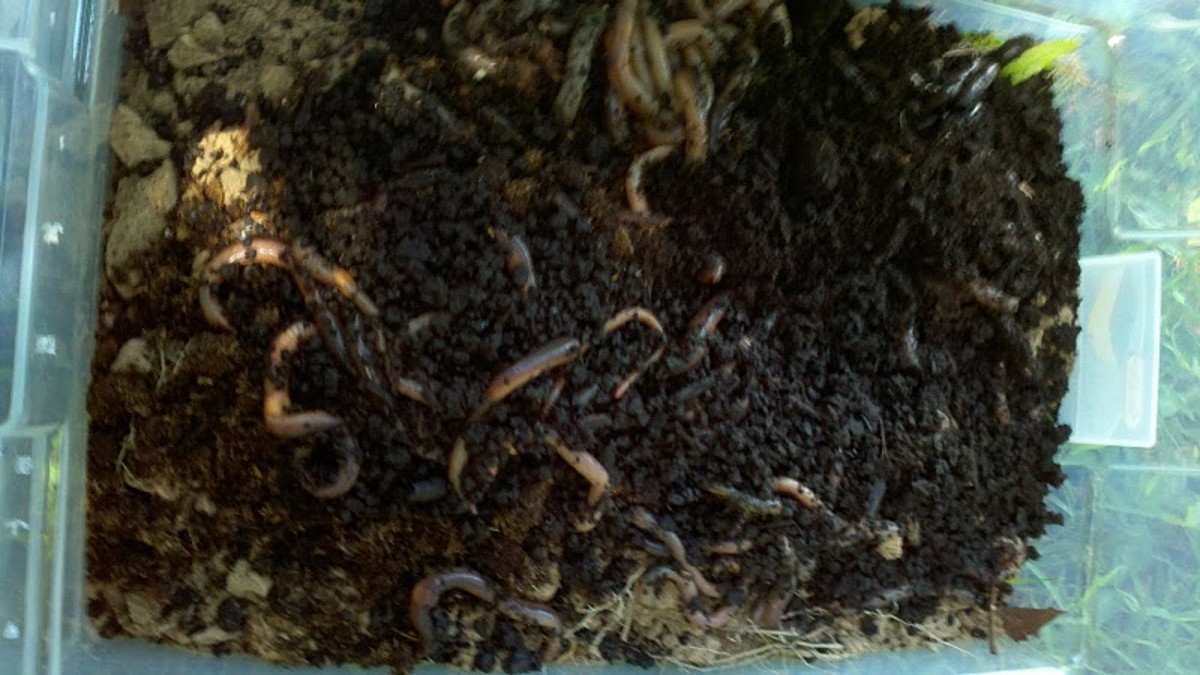
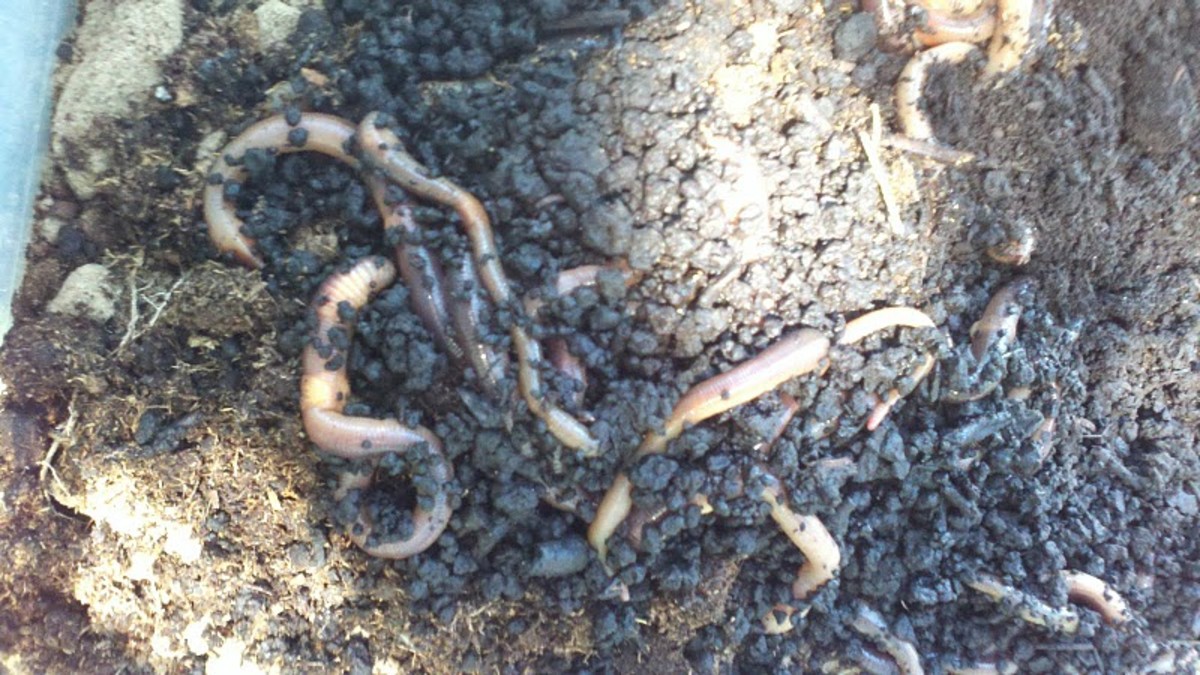
The one common agreement amongst all the people who write articles about making worm farms is that simple everyday earthworms that you find in your yard simply will not do. Apparently, the common earthworm that you are used to seeing doesn't breed as fast or acclimate to captivity as well as some other breeds of worms. Most people recommend red wigglers aka red worms, and others also recommend true night-crawlers and tiger worms. Honestly, I am no worm expert but I figured if most worm farms contain one of these types of worms that are better for farms, then the stores where I buy my live fishing worms probably carry one of these breeds. So I went to both of the local stores that carry live fishing worms and bought four boxes of twelve from each. Now I am just make a guess based on a picture comparison, but I believe one store had the red wigglers and the other store had some form of night-crawlers.
I'm also not sure if it causes problems to mix breeds in the same farm, but I can assure you mine has a mix, especially after I threw a few common earth worms that I found in just for giggles.
At any rate, the next step after getting the dirt half full was to dump my worms in. I dumped them in with the dirt they came with because I figured if it was adequate for storing them it probably had some nutrients and moisture that could be helpful to getting my farm started.
With 4 dozen worms from one store, 4 dozen from another store, and app. 20 or so common earthworms I found, my worm farm started with somewhere over 100 live worms.
After the worms were in I finished filling the contained a couple inches shy of the top with dirt. I figured it would be best for the worms to start in their knew home in the center buried under loose soil and out of the daylight.
I then sat the smaller container inside of the first larger container.
Container Number Two
The purpose of the second container is to help draw out the worms easier. I'm not sure how well its going to work, but if you have ever seen a worm farm that you can buy, it is basically a set of boxes with holes so you can give the worms multiple floors. I was trying to recreate the same effect with a second container. Hopefully the worms will bring themselves up in to the second container for food and easy capture.
I simply drilled holes large enough for worms throughout the bottom of the second container.
Then I set the second container on top of the first one so that the bottom is sitting in the dirt.
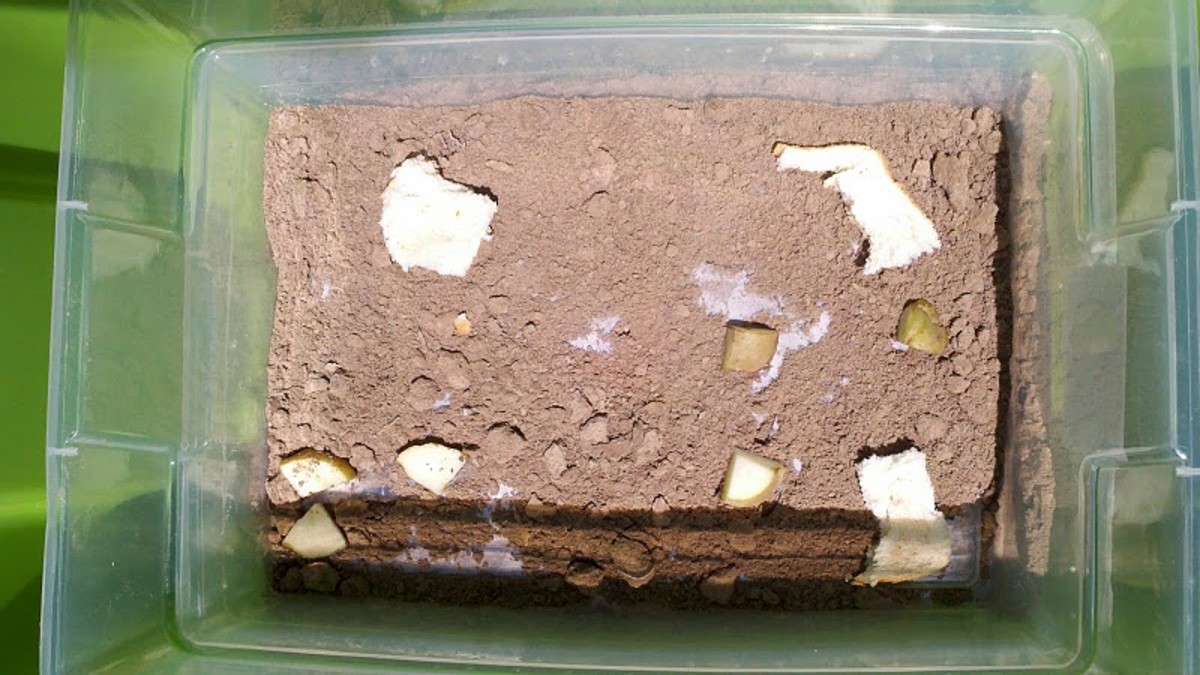
I then added a small amount of dirt in to the bottom of this container along with a few small chunks of potato and bread that I intend to be food for the worms.
I then covered everything with a moist paper towel and a few moist paper plates. I read several places that moist newspaper should always cover food, but I didn't have any newspaper.
Then I put the lid with the air holes on the second small container.
Then I put the lid on the bigger container housing the farm, and stuck the whole farm in a spare bedroom.
Worm Farm Food
So what is the right worm farm food? If you look around the internet there are lots of different opinions about worm farm food, but the common thought seems to be your basic table scraps. Avoid high acidic, sweet, salty, or greasy items. Several of the items I've seen listed as good worm farm food choices include...
- Fruits... apples, pears, banana and peels, strawberries, peaches, melons
- veggies... beans, lettuce, spinach, greenbeans, carrots, celery, potatoes, tomatoes,
- grains... rice, pasta, bread, cereals, cornmeal
- coffee grinds (limited amounts) and coffee filter papers
- tea bags
- paper... newspaper, napkins, paper towels
- dead leaves
As I mentioned doing above it is recommended to keep moist paper above whatever you feed your worms.
My Fishing Worm Farm Future
I will make updates to this hub regularly about the status of my worm farm along with its successes and failures. Wish me luck!
Comments
Post a Comment